Skip to content
Easy Web Things
About
Services
Contact
Posts
FAQ
Case Studies
Updates
About
Services
Contact
Posts
FAQ
Case Studies
Updates
Account
$
0.00
0
Cart
All Posts
Updates
Frequently Asked Questions
Case Studies
FAQ
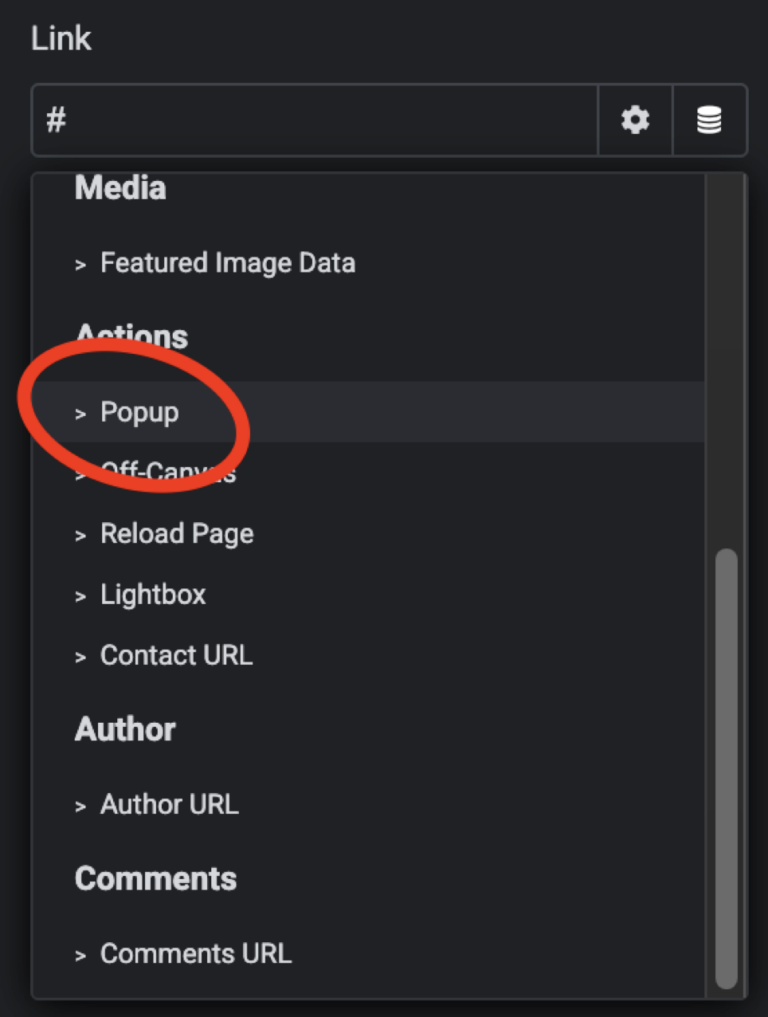
FAQ – How to trigger an Elementor Pop-up with a button or link.
Read More »
FAQ
How do I add a Read More button for WordPress Elementor Post Pages?
Read More »
FAQ
Do you wanna build a website?
Read More »
FAQ
Websites that save time and money
Read More »
FAQ
Why is a Website important for Small Businesses?
Read More »
FAQ
How to style a Shopify Store
Read More »
FAQ
Should I use a DIY website builder?
Read More »
FAQ
How we can make your life easier.
Read More »